Thursday, December 27, 2007

Reno's Christmas 2007 Sweatshirt

I didn't make too many gifts this year, not for a lack of wanting to, but just lack of time and energy. But my mom bought this zip up hooded sweatshirt at Target for her friend Reno a couple weeks ago, and I had an idea to embroider his initials on it.


That night I got online and downloaded his initials from Embroidery Library out of the Ornate Alphabet collection. I first imported the 3 inch letters into my embroidery software and arranged them in a pleasing manner, then combined them into one file. I changed the colors to silver and green to go with the heather gray fabric. My mom helped me with the prep work (stabilizing and hooping the sweatshirt) and then we watched my Viking Designer SE (my dream machine) stitch out the R and the K. It turned out great. Here is a close up of the initials:


Reno's "initial" reaction was to laugh! What a strange response...lol but thats RENO! He did like it, and I think it made the plain sweatshirt much nicer.

Wednesday, December 26, 2007

For Carmela

I just loved this sketch when I saw it on Splitcoast last week, but with Christmas and all I hadn't got a chance to make it. I had a great idea one morning this weekend as I lay in bed (contemplating whether to get up or not...lol) to make a pink and brown birthday card for my late brother's high school and beyond girlfriend (who is now married and has a baby boy). Greg died ten years ago, but we still keep in touch with Carmela because she meant so much to him. She's like a sister to me. Her birthday is on New Year's Eve, and I hope she likes the card.


I used the puffball on a stick stamp from the Heartfelt Thanks set by SU! and Happy Birthday from the Warmest Regards set. The colors are Pretty in Pink, Chocolate Chip and Whisper White. I found some brown gingham ribbon and added some copper brads which are as close to brown as I could get. The circle punches I used are the 1 - 3/8 and 1 - 1/4 ones. I also used my Perfect Layers tool to get a 1/16 mat on the sentiment. Pretty sweet tool. Both the focal panel and sentiment are attached with SU dimensionals. Thanks for looking!

Sunday, December 09, 2007

My First Miranda Bag!


Well it took me a while only because I haven't felt like going in the sewing room for some time, but I finally finished my first Miranda bag!! It is much more involved than the Gracie bag (also by Lazy Girl Designs) but is still a simple to make bag. I used fabric from Moda's Fall Back in Time line by Sandy Gervais. I love how the striped fabric I used for the inside of the bag forms the faux binding at the top. I used the dark green vinyl handles by Exclusively You by Leisure Arts, which are a bit darker than I would like, but I think it still looks good.


Don't you just love all these cool pockets? So much organization in such a small package, although this bag turned out way larger than I expected. That is fine with me, the more room the better! This bag is super sturdy, because it uses heavy interfacing (I used Decor Bond) on both the bag and the lining. It made for some difficult turning of the bag, but once that was done, it was cake.

I love this design and will surely make another. But who knows when? I just have to find the time and pick out some new fabrics! There are so many new lines out now, and I am drooling over some of them!! Thanks for looking!

Sunday, October 21, 2007

Halloween Fun

Just a quick post to show some Halloween wraps I made using Angie's Mummy Candy Wrap Tutorial. This lady is so talented, I had to make a few of these wraps. She also has a Frankenstein wrap that I plan on doing, if I get the chance before Ween.


Also, my mom made some sliding gum wrappers that I thought were so cute I had to post a picture. She doesn't have a blog of her own (but she should, I may make one for her), so I am proud to put her work on mine. She used for most of the wraps the Creepy Crawly paper from SU!, and some ingenious cutting and punching to create the ghost, Frankie, spider, mummy, bat and skull and crossbones! Way to go Ma!

Sunday, October 14, 2007

Keep on Rollin!

I had contemplated getting a new desk chair. The one I have is still in good condition but the casters didn't roll well even on my laminate floor. Mom was over this weekend and took a look at them. I'll I can say is YUCK they were packed with hair and cat fur. No wonder they weren't rolling. She tried her best to cut out the hair but it was no use. So while we were out shopping we stopped at Office Depot and bought a package of new casters. Let's just say the chair rolls like marbles on glass. I'm loving it! And for a girl who is a bit of a weakling, the easier the better! LOL

Unfortunately the casters were $38 bucks, but considering a new quality desk chair is over a hundred, I think it's a bargain!

Wednesday, October 03, 2007

OMG! Guess who subscribed??

Wow was I surprised this weekend when I got notification that none other than Joan Hawley, the designer and owner of Lazy Girl Designs (the best bag patterns on the planet!!!), signed up to subscribe to my blog!! And I don't have hardly any sewing posts on it yet!! So Joan, this post is for YOU!!

I have made three of the Gracie Bag pattern (a total favorite of mine), and this is a picture of the first. It was made from the Seneca Falls fabric line by Moda. This pattern is so easy to do. I suggest it as one that a beginner purse maker could make, no problem.


I didn't get a picture of the second Gracie I made, as I sent it off as a Christmas present for my best friend near Atlanta, GA. I just snapped this picture of the third Gracie I made, which I've had for some time. It was supposed to be a present, but I decided I liked it too much to give away!! It was made from the cream colorway of the Wuthering Heights fabric line by Moda.


The Katy Bag pattern is also a great one. I have made two of them, and here is the pink one I made last year. It was made from the rose colorway of the Wuthering Heights fabric line (yes I love MODA!) I do have some difficulty with the lining laying flat inside, but I'm sure there is something I can do about that. I made one in a chocolate brown fabric as well, but it has fabric handles. I like the sparkly jewel type handle on this pink Katy.


Joan, I CANNOT wait for the Miranda Bag to come out this month. I've already pre-ordered the pattern and all the associated parts. I'm going to make it out of the Fall Back in Time fabric line by Sandy Gervais for Moda. I will take pictures of the fabric and post later this week.

All quilters and sewers should definitely check out Joan's Lazy Girl Designs. I'm so glad I found her patterns. Her Lazy Girl Yahoo! Group is great as well. I love reading about other Lazies and what they are making.

Monday, September 17, 2007

Making Up for Lost Time

Howdy folks, long time no blog. Time seems to get away from me pretty often, and this was one of those times. Not only that, but I haven't been in a stampin' mood. (GASP!!)

The last couple weeks I finished up two cards I had started LAST year (LOL), the sketch from a few weeks ago (SC138), and the Limited Supplies Challenge from two weeks ago (LSC131). Better late than never...

The first card here is Sketch #92, a Halloween card, which I started last year and didn't finish before Halloween so I put it away until this year. This card uses scrapbook paper by Die Cuts with a View, Pumpkin Pie, Basic Black and Whisper White cardstock, and the pile o' jack-0-lanterns from the Halloween Smiles set by SU! I used markers to color in the image. I made 3 of these cards, and I have enough supplies to make one more. I just have to cut another striped panel...


The second card here (another card I started a while ago...) uses the polished stone technique and reverse embossing, just like this card I made here. I used Creamy Caramel, Chocolate Chip, and Whisper White cardstock, and the inks I used include Choco Chip, Creamy Caramel, and Close to Cocoa. The horse image is from the Brushstroke Horses set from SU! The tag is punched out using the Marvy Extra Jumbo Scallop Rectangle Punch, and stamped with the "friend" stamp from the Noteworthy set by SU! I used the direct to paper technique to add a distressed look to the caramel card base using caramel ink. The brown grosgrain ribbon is wrapped around the card front and the ends are tucked under the tag and antique bronze brads hold it down.


This next card is from Sketch #138, from a few weeks ago. I liked the sketch, and looking through my stamp sets I came across the Trick or Treat set from SU! and used the cat head. I've been dying to use this cat face for a while, and thought it would be cute with this sketch. I also used the striped scrapbook paper I used in the first card above! The cardstock is Pumpkin Pie, Basic Black and Whisper White, and I used Versafine Black inknk to get even coverage on the cat face, but it turned out kinda faded and looks kinda dark grey, which is fine with me.


The final card I have for you was for the Limited Supplies Challenge #131, which was to create an Autumn card, and I chose to do the 3rd challenge, the tent topper card. I used another polished stone/reverse embossing technique using one of the outline leaves from the Lovely Leaves set from SU! I used More Mustard, Pumpkin Pie, and Old Olive inks to do the polished stone technique, and punched out a circle using the Marvy Mega plain circle punch. I cut a circle slightly bigger in Whisper White using my Coluzzle companion template to mat. Finally, the Giga scallop circle punch was used to add the Old Olive scallop mat. The card base is Old Olive with direct to paper streaks using ColorBox chalk inks in autumn colors. I cut a strip of More Mustard and swiped it with More Mustard ink and stamped "Warm Wishes" from the Hugs and Wishes set by SU! in Old Olive. I added the antique gold brads to add a little somethin'.


WOW! Four cards in one post! I will try really hard not to be away so long again...

Wednesday, July 04, 2007

Mom's Birthday Card


I made this for my Mom's birthday this year which was June 24th. I started to come down with a cold the Thursday before and hadn't made the card yet! I felt well enough to make this card Friday night, so when she came over Saturday the 23rd it was ready to give. But by then I was in the throws of a huge virus. YUK. I felt awful, not only from the cold, but also because I couldn't take her out to dinner for her birthday. She spent the day taking care of her sicko daughter. What a bummer, for both of us. I finally am well enough to post it.

I just love Perfect Plum, Pale Plum, and Mellow Moss together. I used the puffballs on a stick stamp from Happy Harmony, inked them up with the Perfect Plum, Pale Plum, and Mellow Moss markers, and stamped them on Whisper White cardstock. I punched it out using the Mega scallop oval punch, and mounted it on a Giga scallop oval punch in Perfect Plum. The background is Pale Plum, which was Cuttlebugged using the swirly texture plate from Fiskars. It is more subtle than the Cuttlebug folder. I ticket cornered it and tied moss grosgrain ribbon around it. The sentiment is from Warmest Regards in Perfect Plum, and attached on top of the ribbon. The focal image is attached with dimensionals. I added pewter brads to the corners to finish it off.

Thursday, June 14, 2007

Chocolate Rose Thanks


I just love pink and brown, don't you? I made this card for this week's sketch challenge. This is a very neat, easy to do sketch. I still have most of the papers from the Stampin' Up Loves Me designer paper collection (since I'm a hoarder), so I need to make some stuff from it. This was a great opportunity since you can use the double sided paper to make the putting the pieces together much easier.

I took a 4 inch by 5 1/4 inch piece of the designer paper and cut from corner to corner both ways. (Probably the hardest part of this was cutting the original rectangle, as I wanted the stripes to be going vertical, and the designer paper has the stripes going diagonally!!) Then I flipped the top and bottom triangles over to reveal the other side. I glued them down and attached the brown stitched ribbon from the Seaside collection of Ribbon Originals from SU. This covers any wonky seams. The center image is very simple, just the single flower image from the Heartfelt Thanks set by SU! stamped in Regal Rose, with the outline stamp in Chocolate Chip. I cannot do the two-step stamping with out my trusty Stamp-a-ma-jig, thank goodness for that tool. I stamped the Thanks image in Regal Rose after "rock and rolling" the stamp in Chocolate Chip. Trimmed and matted it in Chocolate Chip and mounted to the card front with dimensionals. How easy is that?

Wednesday, June 13, 2007

Coral and Brown Reverse Emboss


This card was inspired by a beautiful card made by Nichole Heady I saw on her blog, "Capture the Moment". Let's just say I'd like to capture her talent as well as her creativity! Nichole has a great tutorial for this technique of reverse embossing, and I just had to try it with my Reverse Prints hostess set by Stampin' Up. I used the colors from this weeks color challenge which calls for Cameo Coral, Certainly Celery, and Chocolate Chip, with an optional Tempting Turquoise. I opted OUT of the turquoise for this card...

I used the French Script background stamp in celery on Whisper White, and stamped the main image in Versamark, then clear embossed it. I sponged chocolate chip allover it to reveal the flower image and create a "halo effect" around the image. I then wiped off the excess ink and mounted it onto Chocolate Chip cardstock after I ticket cornered it. I added antique gold brads, tied a piece of brown grosgrain ribbon around and mounted onto a Cameo Coral card base using dimensionals. That's all there is to it! Thanks Nichole for the inspiration! You rock!

Wednesday, June 06, 2007

Heartfelt Thank You and a New Obsession


I made this card for this week's color challenge on Splitcoast. We were to use Elegant Eggplant, Ruby Red and Certainly Celery. I used the main flower image from the Heartfelt Thanks set by Stampin' Up, and colored it in with my eggplant, ruby, and celery markers. I stamped the outline over it in eggplant and always artichoke using my Stamp a ma jig. I used my ticket corner punch on the white and the celery cardstock, and mounted them on the ruby red cardstock. I added the gold brads and attached it to my eggplant card base with dimensionals.

For the circle accent, I used my markers to color in the Thank You Very Much stamp from the Riveting set by Stampin' Up, then cut just outside the line. I need to get the 1 1/4" circle punch, as it would have been MUCH easier. Then I mounted it onto a 1 3/8" eggplant circle, and attached with a dimensional. One more step would have made this perfect for the sketch challenge this week, except I couldn't figure out how to attach the strip across the center front without covering up most of the flower. Oh well.

Isn't it funny how you can stumble across a technique or design and you just get obsessed? This week's technique challenge was to make an origami shirt out of designer paper. Cambria Turnbow (a very talented lady I might add) has an excellent tutorial on her blog. The step by step pictures are very helpful. I've made several of them, although I have had yet to make a card using them. But aren't they adorable? Hopefully soon I can put them to use. Enjoy!

Tuesday, June 05, 2007

Happiness Always

Sometimes being under pressure to get a card done can be a good thing. My best friend Patsy's anniversary is in a few days, and I just remembered today! Got to get a card made and made FAST! I had the idea to use the Happy Anniversary stamp from Favorite Greetings set by Stampin' Up!, but naturally I can't find that stamp! I must have used it a while back and didn't put it back, and my house is like a black hole sometimes.

As I was looking through my collection of stamps, I came across the Happy Harmony set, a Sell-a-bration set I hadn't used yet. EUREKA! There is a stamp in there which says "Happiness Always" which is what I wish for Patsy and her wonderful husband Tim.


For this card, I used a Rose Red card base, and the Palette O' Prints papers in Rose Red and So Saffron. I cannot wait for the new catalog, which will have these papers in 12x12 sheets in lots of colors, including the new In Colors! The designs are so yummy! I used the trio of flowers stamp from Happy Harmony, inking them with my markers in Rose Red, So Saffron, Regal Rose, and Mellow Moss and stamping on Whisper White Cardstock. I cut out the oval shape with my Coluzzle, and mounted it onto a scallop oval in Rose Red (Giga size). The image is attached to the card using dimensionals. I stamped Happiness Always in Rose Red on a scrap of WW and cut out using the Coluzzle. I sponged the edges lightly with Regal Rose, and attached using mono adhesive. The ribbon is from the Sweet Shop collection of the SU Ribbon Originals, and is attached with glue and trimmed at the sides of the card. It matches PERFECTLY!

Now let's just hope this card makes it to Atlanta by Saturday.

Monday, June 04, 2007

My "Assistant"

For the past few weeks I have been working at home, since we are remodeling the office building where I work. It has been very hard to stay focused on work, with TV, the internet, and the bed all calling my name. There is only another couple weeks to go, and I actually can't wait to go back to the office. I have been going in every couple days to get files to work on and get more work to do and review with my boss.

My Assistant
When ever I have a huge set of construction plans to look at, I lay them on my bed which is right behind me when I am at my computer. Unfortunately, Dexter comes along and spreads out on them. He doesn't realize he's not helping. But eventually he gets bored and leaves. Which is good because it is so hard to move him when he looks so happy and comfortable.

Assistant - Up Close

Thursday, May 24, 2007

Watermark!

As you noticed in my last post, I've got a watermark now! I'm not TOO worried about people stealing my images, since they're not as super fantastic as other bloggers out there, but I thought it would be cool to have one, and I can have copyright information for Stampin' Up images like I'm supposed to. I used Photoshop Elements 4.0 to create it, following the tutorial put together by Kurtis Amundson, otherwise known as Stampin' Kub. He's quite talented in all things stamping (puts me to shame big time). But of course why wouldn't he be, his mother's a Stampin' Up! demo!! His website is wonderful, and I am inspired everytime I visit. Take a look for yourself! His video on creating a watermark is in the Tutorial Section under "Tips".

Stampin' Kub

Totally Cool Triangle Sketch

Sketch Challenge #124 over at Splitcoast was so interesting, I've made three so far. The first one I did was for my grandmother, but the picture was so awful I don't want to post it here, and since I don't have it anymore, I can't reshoot. But since then I have made two others that came out better anyway.

The best way to go about doing this sketch is to start with your scrapbook paper cut at 3 3/4" by 5". Flip it over to the back, and make a mark on one short end 1/2" from the top and from the bottom. On the other short end, make a mark 1 1/4" from the top and from the bottom. Connect the top mark on one side to the bottom mark on the other side, and do the opposite going the other way to make an X. Cut apart on these lines, and you have your two triangles! I matted these triangles 1/8th " on the two long sides of each triangle, with the short side flush. Then on a 4" x 5 1/4" panel I centered the triangles facing each other. There is a slight overlap which you could trim, but since you will be covering it with your focal image, it doesn't really matter. This panel is then attached to a regular size card base (4 1/4" x 5 1/2"). I hope this makes sense.

The card below was made using Tempting Turquoise and Chocolate Chip cardstock, to go with the scrapbook paper I got in the Die Cuts With A View 4x6 Retro pad. The turquoise panel is Cuttlebugged using the "fabric" Fiskars Texture Plate, and attached to a Choco Chip card base. The focal image is made using the flower and Thank You background stamps from the Mini Messages set by Stampin' Up! I used Tempting Turquoise ink for the flower and Chocolate Chip ink for the background Thank You's on Whisper White cardstock. I punched this image out using my 1 1/4" square punch and matted it with a Marvy Mega scallop square in Chocolate Chip. I attached the focal image using dimensionals. I just love this color combo!


I liked this sketch so much that I made another card using the sketch and also for the Ways to Use It challenge for the week (WT114) which was to use of all things, YOYO YELLOW! Yuck! Not my bag, so I made it a secondary color for this card, which is mainly Pumpkin Pie! I stamped the Thanks So Much stamp from the Riveting set by Stampin' Up! in Pumpkin Pie on Whisper White cardstock and punched it out with the 1 3/8" circle punch, matted it with a Super Jumbo (blue Marvy punch) circle in Pumpkin Pie and again matted with a Mega Scallop Circle in Yoyo Yellow. The triangles are made using a downloaded digital scrapbook paper from Lettering Delights.com, matted in Yoyo Yellow and placed on a Pumpkin Pie panel and attached to a Yoyo Yellow cardbase. The circle focal image was attached with dimensionals. I probably would have added a touch of Certainly Celery cardstock, but I'm out and need to order more...


This won't be the last sketch like this I'll do, but I like this week's sketch too, so maybe I'll have to move on for a while...LOL!

Tuesday, May 15, 2007

Winter Fluffles


I know its spring, and really close to summer, but I chose to do a January themed card for the Year of Fluffles swap being held on Splitcoast, since it was the last spot open in the swap. I used the Snowboard Fluffles stamp, and also the Winter stamp from the Season by Season set by Stampin Up! I colored him in with So Saffron, Brocade Blue, and Bashful Blue markers, and used Julie Buhler's technique for making a scalloped circle using the small corner rounder and Night of Navy cardstock. (Julie, I hope you don't mind me linking to your website. I'm a huge fan!)

For the background I ran Brocade Blue cardstock through my Cuttlebug using the Fiskars snowflake texture plate and notched the corners with the ticket corner punch. I stamped "Winter" on a scrap of white, and scraped the edges on the Night of Navy pad to define the edges. I glued a piece of navy grosgrain around the background piece and attached the Winter piece with glue dots and added a special brad. I attached the Fluffles focal image using pop dots for dimension. I used Sticky Strip to attach the whole thing to a Night of Navy card base because the embossed background needed extra hold. And thats about it. Oh by the way, I made twelve of these...WHEW!

Sunday, May 13, 2007

Happy Mother's Day!


Happy Mother's Day to all the moms out there! This year I gave my mom a gold bangle bracelet, and I made a gift bag out of Certainly Celery cardstock using the pattern that was in PaperCrafts magazine a while back and was also Technique Challenge #102. The center panel uses one of the green papers from the Palette O' Prints pack available now from Stampin' Up. I used brown grosgrain ribbon I got at Michael's for the handles and attached it with Sticky Strip to make sure it stuck. The bag was also put together with the same sticky tape. I was happy to see I had matching green brads to add to the top of the bag on the ribbon! I made a matching card using the same colors and paper and the Sketch Challenge 105 (one of my favorites!), with a bit of Chocolate Chip cardstock for the matting. I used the Happy Mother's Day stamp from All Year Cheer II (too bad its retiring) in Chocolate Chip ink on Whisper White cardstock and punched it out with my Mega scallop oval punch and matted it in Chocolate Chip with the Giga scallop oval. Mom was thrilled!

Wednesday, May 09, 2007

Olive Polished Stone Tree

This past weekend, as we counted the hours until Dexter could get that stupid cone off (see this post) Mom and I decided we would take our minds off it by doing a technique that I had been wanting to try, but hadn't got around to, the Polished Stone Technique. I used Old Olive, Mellow Moss, and Certainly Celery to do the background using the technique (no metallic inks) after I embossed the tall pine tree from the Lovely as a Tree set by Stampin' Up! with clear embossing powder on glossy cardstock.


As the ink dried, I noticed that the embossing was starting to peel away, so I thought it should be removed totally, so I had Mom iron it off between sheets of typing paper. It turned out so well if I do say so myself! I matted it with white so the white tree would "pop", tied white grosgrain ribbon along the side, and attached the image to an Old Olive card base with Stampin' Dimensionals (foam pop dots).

We liked this so much, I made two other images using the same technique with different stamps and ink colors, but haven't made any cards from them yet. But stay tuned...they are coming!

My Little Bobcat

I haven't posted in a while. I've been pretty busy and also a bit down. A few weeks ago my kitty Dexter had a biopsy on a lump on his tail and it came back as a malignant tumor. Needless to say I was devastated. He is only six years old! The vet recommended that his tail be amputated as there was no guarantee they could get all of it otherwise. So two weeks ago we took him to a specialist surgeon in Maitland (north of Orlando where I live) and they amputated all but about three inches of his tail. I cried that whole day.


They kept him overnight for observation, and the next day we went to get him. He had to wear what they call an e-collar (but we called it the Cone of Doom) until his sutures were removed, which was this past Monday. He hated every minute of it, but came to accept it after a couple of days. He couldn't bathe himself that whole time, and kept trying to, but all he could lick was the inside of the cone. Poor thing.

But the cone is off! And now we just have to wait for the fur to grow back on his tail and pray that the cancer didn't get a chance to spread. We go back in three months for a check up then every three months after to keep an eye on him. He is my little boy and I am not ready to lose him.

Saturday, March 24, 2007

Four Patch Frenzy

Sigh, I am so behind on the mystery. I haven't even finished Step #2 and they are already on #13! There are a few that are behind like me, but it seems as though most are up to speed. The last clues will be posted tomorrow. No way will I be caught up. It's time for bed. Oh well.

Sunday, March 18, 2007

Quilting again!

Yesterday was National Quilting Day, however I never made it into the sewing room. Oh well, today I spent about three hours in there working on my Cinnamon O's quilt. I've got both the brown and the red sets of 3.5 inch squares done, which means the 2 inch background squares have been added to opposing corners of each colored square. I still have the aqua, golden tan and light green ones to finish, then I will create each O. Each O takes 4 of the 3.5 inch squares. I thought about making the O's as I finished each colorway, but I get in a zone and chain piecing is so fast, I think I'd rather get all the individual pieces done, then make the O's. But I could change my mind. We'll see.

I bought fabric for a new mystery called Four Patch Frenzy, and two clues have been posted for it, but I haven't cut into the fabric yet! I hope I have a chance to do that this week, because this weekend all the clues will be posted, and I don't want to fall way behind and not finish with the other quilters. Here's hoping.

Saturday, March 17, 2007

Fluffles Makes Me Smile


Another adorable Fluffles card. Sigh, I love this little kitty.

This card is inspired by both the Color Challenge #104 and Sketch Challenge #113 on Splitcoast's website. I'm always late for these challenges, but better late than never.

This card uses Regal Rose, So Saffron, Certainly Celery, and Chocolate Chip SU! cardstock. The Flying Fluffles stamp was stamped three times on Whisper White cardstock in Basic Black and punched out using the 1 3/8" square punch. I colored in Fluffles using my So Saffron and Pretty in Pink SU markers. I used the Marvy Mega scallop square punch to punch three Regal Rose squares to mat the kitty squares.

The center strip behind the diamonds was made by Cuttlebugging a 1-1/2" strip of So Saffron using my Fiskars Texture Plates (the grass plate from Texture Asst. #2), and matted with a 1-3/4" strip of Chocolate Chip. The base card is made out of Certainly Celery, and I stamped the verse (from the Small Sayings set) in Chocolate Chip. I love doing dual challenges!

Saturday, March 03, 2007

Old Sketch Challenge

When I saw Splitcoasts's Sketch Challenge #105, I really thought it was cool and wanted to do it. But at the time it came out (first week of January!) I had no easy way to cut a large circle. No Coluzzle, no die cut. So I had to wait. I bought a Cuttlebug die cut machine and a huge Sizzix circle die, but still wasn't ready because I wanted to mat the scrapbook paper circle, and I can't cut a circle with scissors to save my life. So I had to order a Coluzzle companion circle template to mat the circle. No one ever said card making was a cheap hobby!


So I finally got all the tools I needed, and here is my card. I decided to make a get well card for my mom's friend Reno, who has thrown his back out working around his house.

I have totally fallen in love with my Cuttlebug machine, especially after I bought the tan polymer pad used with the Spellbinder Wizard machine for use with my Fiskars Texture plates. I got the idea from the Cuttlebug sandwich thread on Splitcoast. I used the lines plate to lightly emboss the background piece of Certainly Celery cardstock, which I trimmed down to 4x5.25", and notched the corners using the Concave Corner Adorner.

For the circle portion, I used my Cuttlebug and the large Sizzix Circle die (approx. 4") to cut a piece of scrapbook paper. It is this paper that was my inspiration for the color combo I used. I then used my new Coluzzle Companion circle template to cut the mat in Rose Red. Then I trimmed the left side of the circle off approximately one inch and mounted it to the embossed piece of celery cardstock.

The white tag is made from a Cuttlebug oval slider die, and it's small size makes it a bit difficult to put a sentiment on it. I got out my Stamp-a-ma-jig and rearranged the Get Well Soon from the Sincere Salutations stamp set from Stampin' Up! so that it would fit in the tag, using my Rose Red marker. The Marvy Mega Scallop Oval punch mats the slider tag perfectly in Rose Red, and I ran Stampin' Up's celery organdy ribbon through the slots in the white tag. I mounted the tag using pop-dots and wrapped the ribbon around the cardstock and attached with adhesive. Then I mounted the entire thing on to a piece of Rose Red cardstock. Whew!

I really like this sketch a lot, and plan on doing more like it in the future, now that I have all the necessary equipment!

Friday, February 16, 2007

Quilty stuff

It has been a really long time since I've been in my sewing room. I've been so tired after work and then get sucked into the internet and before I know it bedtime is here. Well I decided this week I would get back in there.

I joined the Stashbuster Yahoo! group last week and have been inspired to work on some UFO's. I wanted to get going on a quilt I started cutting fabrics for months ago, the Cinnamon O's pattern. I bought the fabrics for the quilt in a kit from the Fat Quarter Shop, a webstore I love to go to. Kimberly, the owner, has all kinds of fat quarter bundles of Moda and other manufacturers. It's a bit dangerous for me! I decided to make the quilt a bit smaller than the pattern calls for, since I prefer not to piece my backing, and like smaller quilts because they are easier to handle when quilting.

The kit included one fat quarter from each design of each colorway. There are five colorways in the Cinnamon Stars fabric line: red, aqua, light green, tan, and brown. I needed two 3.5 inch strips from each fat quarter, then cut into 3.5 inch squares. I finally finished cutting all my 3.5 inch squares tonight. I'm exhausted! Next I have to cut the 2 inch squares from the background fabric, which I got tons of. Looks like I will have a bunch left over. My wrist hurts from rotary cutting.

Hopefully I can cut the strips I need over the next week and get to piecing, which is ultimately more fun than cutting. Its a beautiful pattern and I can't wait to finish it to see how it comes out.

Sunday, February 11, 2007

More Fluffles to Love

Sometimes I think I may have a small case of obsessive compulsive disorder. In this case, I fell in love with Fluffles the Cat stamps, and now I have about 12 of the little guy stamps. He kinda looks like my cat Dexter!


I made this card for my mom for Valentine's Day, and used the Fishy Fluffles stamp. It is so cute. The card is made with Pretty in Pink cardstock and the scrapbook paper background I downloaded from CreativeDelights.com. They have lots of high quality image files of 12x12 backgrounds for use in scrapbooking, although my printer has to clip down to 8.5x11. I thought that the rosy pink color went well with the Pretty in Pink. I almost went with Regal Rose but there was not enough contrast I believe.

I stamped the image onto Whisper White and punched it out using the Marvy Mega Circle punch, and since I have had yet to get the Giga scallop circle, I used my new Coluzzle circle template to cut out the next biggest circle out of Pretty in Pink for a mat. I think I need to get the companion circle template because I'd rather there not be so wide of a mat. Can't wait to get my scallop punches! But I have to say, I was worried about being able to use the Coluzzle, but my goodness it was easier than I thought! Pretty cool tool.

After I colored in the image with So Saffron for Fluffles, Bordering Blue for the fish, and Pretty in Pink/Regal Rose for the hearts with the SU markers, I mounted it onto the card with Stampin' Dimensionals. I tied light pink SU grosgrain ribbon around the top of the card and for something extra added a little pewter brad heart in the lower corner. I have really taken a liking to the 4.25x5.5 cards that open at the top. A bit different from what I'm used to!

Saturday, February 03, 2007

My First Card on my Blog!


I've made quite a few cards over the past few months and posted them in my gallery on Splitcoast, but this is the first card I've posted on my blog! I started this blog mostly because I've been visiting other people's blogs who post regularly on Splitcoast, and wanted one of my own. I don't know why I haven't got around to posting a card on my own blog, probably because I haven't been stamping much lately. But after seeing blogs like Stampin' Mama, Taylored Expressions, Paper Trufflez, and Prairie Paper and Ink, I've finally decided to jump in. I am NO where near as talented or creative as these ladies, but they give me the inspiration and the motivation to at least do what I can. I learn a lot from their sites.

I fell in love with Fluffles the Cat from Stampendous, after seeing him pop up on the gallery at Splitcoast. I am a true cat lover, and this little guy is ADORABLE! I went nuts and bought this stamp along with about nine others, and hope to make more cards that feature him. I like this one the best, because I also like bees.

I used Whisper White cardstock and Basic Black ink for the stamped image, and punched it out with the Marvy Super Jumbo circle punch. I could have used the larger Mega circle punch, but SOMEHOW I managed to get a smudge of ink along the edge of the design after I had gone to the trouble of coloring it in with my markers. Sigh. So I punched a smaller circle clipping some of the design. Next time I will be more careful...lol

I mounted the circle onto Lavendar Lace cardstock and trimmed around with my pinking shears (I am lousy at using them). I cannot WAIT for the scallop circles and oval punches from Marvy to be available again. I cut a piece of Lavendar Lace cardstock 4.25" by 8.5" and folded it in half to make a 4.25" card. I then cut a 4" square piece of purple plaid scrapbook paper and plopped it onto the card front. I tied a piece of purple ribbon (from the Downtown collection by American Crafts) around the top of the card front, and added a bit of adhesive to keep it in place. Finally I attached the kitty circle with Stampin' Dimensionals (I love those little pop-dots!)

So there it is, my first blog card. Simple yes, but I like it! GO FLUFFLES GO!

Thursday, February 01, 2007

New Look

I decided to update my blog today. I got tired of the green swirly so I took a cue from blogs I visit regularly and decided to make my own header. Its a work in progress, but I kinda dig it! I switched templates to the minima Blogger template which is (as its name implies) very simple and minimalistic. It took some working to figure out where to edit the HTML so that the image I created plopped in the right place, and I had to adjust table widths so that everything would show up where it should. I may change the background color since white is SO white! We will see. I also changed my profile pic. Enough modifying for now. See ya!

Wednesday, January 24, 2007

Not ALL About Me

I usually don't do these things, but I've seen people put them on their blogs, so why shouldn't I? This is from my best friend Patsy in Georgia, and instead of emailing it to all my friends (all five...lol) I'll just post it here!

1. What time is it? 10.47 pm
2. Full Name: Cindy Michelle %#(@& (edited for privacy)
3. What do you fear most? Fire and drowning/suffocating
4. What car do you drive? Silver Mazda MPV (but I'm no soccer mom)
5. Have you ever seen a ghost? Nope
6. Where were you born? Melbourne, FL
7. Ever been to Alaska ? No
8. Ever been toilet papering rolling in decorating trees? No
9. Croutons or Bacon bits? Croutons
10. Favorite day of the week: Saturday
11. Favorite restaurant: Olive Garden (but I eat from the kids menu!)
12. Favorite Flower: Sunflowers
13. Favorite sport to watch: Not a sports fan
14.Favorite Ice Cream: Chocolate Chip
15. Disney or Warner Brothers: Disney
16. Favorite fast food restaurant: McDonald's
17.What color is your bedroom carpet: none, I HAVE OAK LAMINATE NOW! YAY
18. How many times did you fail your driver's test? Zero
19. Before this one, from whom did you get your last e-mail from ? Non spam or commercially, Betty the secretary at work
20. Bedtime: Around 11-11:30 during the week, 1-2 am on weekends.
21. Who will respond to this email the quickest? no one, not sending...heehee
22. Who is the person you sent this to that is least likely to respond??? again, not sending
23. Who is the person that you are most curious to see their responses: oh forget it
24. Favorite TV show? Lost, Prison Break, Desperate Housewives, American Idol
25. Ford or Chevy: neither
26. What are you listening to right now? Evanescense
27. What are your favorite colors? Navy, brown, red
28. How many tattoos do you have? none
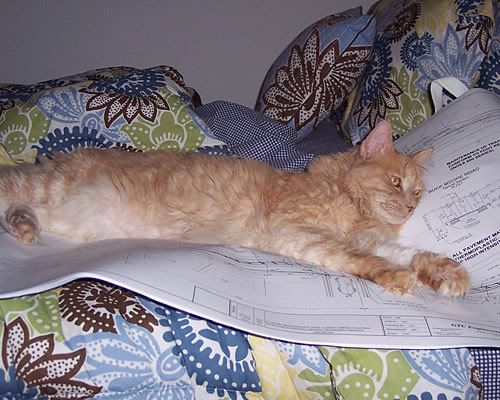
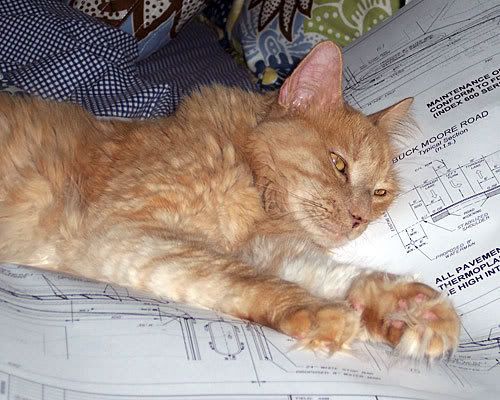
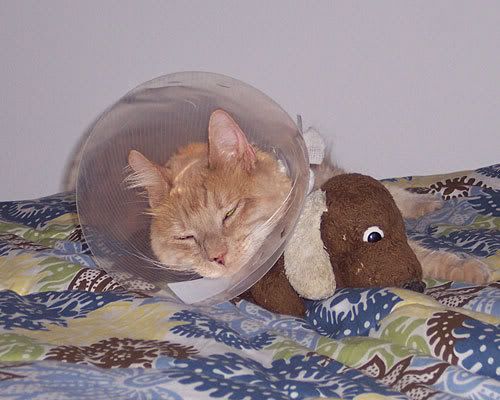
29. Do you have any pets? Yes! My beautiful cat Dexter
30.Which came first the chicken or the egg? I say chicken, because I don't believe God started with an egg, he didn't make Adam a baby
31. What would you like to accomplish before you die? Find a good man to love and love me
32. How many people are you sending this e-mail to? None

Wow, it took me 10 whole minutes to do this. Better get to bed now, work tomorrow and all.

PS. Reno and Mom came back today and finished the floor. It looks so AWESOME! RENO ROCKS! And American Idol was hilarious. Especially the girl at the end who sounded like she was having an orgasm. Gees...some people.

Sunday, January 21, 2007

New Floor is almost done!


Well, it took three days but the new laminate flooring in my bedroom is about finished. The flooring itself is in, but there are still a couple of places that need moulding around the baseboard and the thresholds need to be put in. But I am LOVING this oak floor! It is so much fun to roll around on in my computer chair and I enjoy the new layout of my furniture. I moved the desk to the other side of the room by my window and took the bed out of the corner and placed it up against the wall. The dresser used to be where the desk is now but has been moved to the other side of the entrance to the bathroom. The armoir (which houses stamping stuff) has been moved to the corner where the desk used to be. How much fun swapping furniture. The past few days have been crazy, with all the bedroom furniture in the living room, and stuff in boxes all over the place. Thank goodness most everything is back where it belongs, but Mom and I still have a few boxes to sort through and put crap back where it belongs. But it is so worth it.

Reno did a great job, and he worked LONG hours. He and mom came over Thursday morning, and he worked all day until about 11 pm when he left for a hotel. He came back the next morning, and worked until 11:30 pm or so, and drove the 70 miles back to Satellite Beach. Then came back yesterday, and my God he was here until after 1:00 am this morning! I was glad to hear he made it home to Satellite Beach in one piece. He still has a couple of things to finish, but they are not major, and can wait for him to come back later this week.

Dexter and Drooper
Dexter is happy as a clam now that everything is sort of back to normal. He has been asleep on my bed all afternoon. And Mom put my old stuffed dog "Drooper" on the bed, and Dexter has made friends with him. And just how cute is this picture?

Sunday, January 14, 2007

Moving the computer! ACK!

Today my mom and I moved my computer into the living room, because her friend Reno is coming over this week to put laminate flooring in my bedroom. I'd rather it get all set up ahead of time so that it can be used while the bedroom is all, shall we say, JACKED UP! It took almost and hour to disconnect everything, then reconnect it all in the living room on the dining room table. It is so weird to be in here (living room) and Dexter is totally confused. He usually lays on my bed while I on the computer, and he can't figure out what is going on.

Since the cable to the modem is in my bedroom, we had to get an extension to the coaxial cable so it would reach out the door and around the corner. Trip to Target! While we were there we picked up some other things, and the bill was over 52 bucks! It's amazing how it all adds up. And a little bit sad...

Oh, and I'm testing the dual TV tuner at the moment, recording America's Funniest Videos and watching "Van Wilder" on Comedy Central. We will see if it worked a little later. I'm planning on watching the premiere of "24" on Fox, even though I've never seen any of the other seasons. If I get hooked I may have to rent the other seasons.

Thursday, January 11, 2007

I love being a geek

When I bought my latest computer, I got a Dell (yeah I know, dude I got a Dell...) XPS410 with Windows XP Media Center and it came with a tv tuner. It was super cool, I could watch TV while I surfed the web and chat with friends. And the coolest thing was I could record tv shows to my hard drive! Not only that, but I signed up with Orb.com, which allows me to watch tv from ANY internet connected computer, as long as my computer is on at home! So last October when I went on my trip to Chattanooga, Mom and I were able to watch All My Children that my computer recorded for me in the hotel room! It was so awesome!

Well as time went by, I realized I wanted to be able to record shows at once, or record a show and watch a different channel at the same time. But the tuner was only a single. I could have gotten a dual tv tuner when I ordered my Dell, but I didn't. Wasnt thinking! So today I installed a dual TV tuner on my computer so I could watch and record two channels at once on my computer. The hardest part was figuring out which slot to put it in, because the original tv tuner was a different type of card. But it went off without a hitch! No problems. I am so glad God blessed me with a brain. I save so much money doing this crap myself. The Geek Squad would have charged me a fortune!

Sunday, January 07, 2007

I hate returns

Gees, with as much shopping online as I do, there is bound to be times that I have to return stuff that is either the wrong size (which is usually the case), wrong color, or just plain WRONG! Also, when I do go shopping at stores like Target, Sears, etc. I have to return things because I never try on at the store, it's just TOO tiring for me. Well today was a ultra mega return day.

Last month I ordered from Kodak.com. I bought a new digital camera, the Easyshare V610. Pretty neat, it's sleek and black, has a huge LCD screen, 6.1 megapixels, dual lens technology, 10X optical zoom, and neat video capability. It also came with a free 1GB memory card. With the camera, I also ordered the printer dock which came with a free travel case, and an accessory pack which included a case for the camera and a beautiful beaded neckchain and wrist chain. Well, the case did not fit the camera, despite what the website said. I was peeved because I didnt want to pay for return shipping, when it wasn't my fault that the case didnt fit. But I had no other choice. I also decided I didnt really need the printer, so I went to Office Depot today to return the accessory kit and printer/case via UPS. Cost 10 bux to ship, but should get back around $170.

I also made an order at Kmart.com last month. I saw in the local weekly ad in the paper a button up cardigan sweater that came in vanilla and also in black. I was going to go to the store to buy it, but when I checked online it was actually CHEAPER to buy it online. So I ordered one vanilla and one black. When the package arrived, to my dismay the vanilla sweater was there, but the black sweater was not. In its place was, get this...a corningware bowl. WHAT??? So I called customer service, and was told to take the bowl to the nearest Kmart and tell them that there was a mistake, and that I would like a refund of the sweater I did not receive. Well, I went today to the Kmart down the road, and guess what, NO SATISFACTION. The lady was rude and unfriendly, telling me she couldn't do anything because I didn't have the sweater. HELLO! That's why I'm here dummy! So I don't know what is going to happen now. I emailed customer service for the website and we'll see.

Lastly, I bought some clothes (two sweaters and a pair of pants) in the girl's department at Super Target in September, and later decided I didn't want them, but didn't get around to taking them back until today. Unfortunately, the receipt expired two weeks ago and they would not give me a refund, NOT EVEN a store credit. So I'm out almost 50 bucks. I know it's my fault for waiting too long, but I'm still mad about it. I'll not make that mistake again.

So anyway, didn't buy anything today, too p.o.'d and tired. I wanted to go to Joann's and use the gift card my good bud Patti gave me, but was exhausted and headachy from dealing with surly people. Maybe I can go by myself this week, and get some use out of that hot red scooter sitting in my garage...